How to create expandable post summaries on blogger
Today im going to show you how to create expandable post summaries on new blogger this is a great trick for those who have lots of long articles on their blog and would like to show a certain amount of text/images from the beginning of that post on the main page with a read more link at the bottom. So lets get started first i recommend you download a backup copy of your template so if anything goes wrong you can always restore from that. Next we need to make sure we have post pages enabled so go to Settings > Archiving and change Enable Post Pages to yes like mine in the following screenshot below
Continue reading »
Copyright infringement
Today I'm a victim of plagiarism the owner of this http://hellohello100.blogspot.com/ site has copied my whole blog and the content like a big fool and he has even pointed me to his profile page here http://www.mybloglog.com/buzz/members/fauzirassull/?fs=2007080618174203 on my bloglog and here http://profiles.friendster.com/fauzirassull so just to let my visitors know he has stole my content and I'm waiting to get his site shut down here is a screenshot of my sitemeter
Continue reading »
How to make a 4 column blogger template
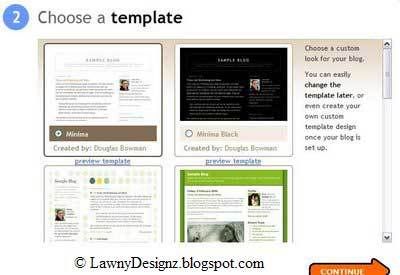
In this tutorial we will be making a 4 column blogger template based on a two column originally designed by Douglas Bowman so i recommend you create a new blog for this tutorial using the following template

Now we have our template we need to find the header-wrapper CSS code and change the width from 660px to 100% or 990px like ive done below
Continue reading »
Now we have our template we need to find the header-wrapper CSS code and change the width from 660px to 100% or 990px like ive done below
Continue reading »
Create a nice feed icon in Photoshop
Today I'm going to show you how to create a nice Rss Feed icon below is my final result

First create a new document width 200px height 200px background colour white

Continue reading »

First create a new document width 200px height 200px background colour white

Continue reading »
How to add a navigation bar
Today i will show you how to add navigation links just below your blogs header like mine above and it depends what template you are using but it will fit most so always use a test blog before you apply it to your current blog as I'm not responsible if you mess your template up and there is lots of different styles you could have but I'm going to show you how to add a simple set of navigation links so first we need to copy the following CSS code
Now paste it like i have done just below the closing skin tag

Now you need to copy the following XHTML code changing the red parts to where ever you are pointing your links to. The first part with the / points to your blogs homepage
and paste it just below the header closing div tag like I've done below
Continue reading »
/* navigation links css code

----------------------------------------------- */

#topnav {

height:40px;

}

#topnav ul {

float:left;

width:100%;

padding:0;

margin:0;

list-style-type:none;

}

#topnav a {

padding:3px 7px 3px 7px;

float:left;

text-decoration:none;

color:#000;

margin:9px 10px 0 0;

}

#topnav a:hover {

color:#666;

}

#topnav li {

display:inline

}
Now paste it like i have done just below the closing skin tag

Now you need to copy the following XHTML code changing the red parts to where ever you are pointing your links to. The first part with the / points to your blogs homepage
<div id='topnav'>

<ul>

<li><a href='/'>Home</a></li>

<li><a href='#'>Contact</a></li>

<li><a href='#'>Link 3</a></li>

<li><a href='#'>Link 4</a></li>

</ul>

</div>
and paste it just below the header closing div tag like I've done below
Continue reading »
Subscribe


